Description
After years of experience with CO2 systems, we discovered why consistent "bubble counts" are, most of the time, impossible. Here's why: ALL check valves, even expensive ones, have a "high crp" or "crack pressure" rating (the pressure at which they actually release) and/or a very inconsistent "crp" pressure" rating. We actually took a "caliper" and measured the CO2 tubing at different times and what we found is this: The tubing is actually a "long balloon"... When pressure builds in the tubing (because of a high crp rating of the CV) CO2 is "stored up" in the tubing, until the CV opens. Then it releases, then it builds up again, and more or less "cycles". What you experience is a very inconsistent bubble count.
Another problem that been a major issue is "water corrosion" "mineral buildup" (even worse: saltwater corrosion!)
No check valve that we have used or tested in the past seems to last very long when used with saltwater. (even stainless steel springs/check balls corrode)
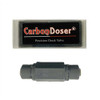
This Check valve is custom manufactured to our exact specifications. (in the USA)
It is specifically made for us, with a "ball" that won't corrode and a spring material that it more corrosion resistant than stainless steel.(The actual materials used are proprietary)
- 4 lbs crack pressure (any less is not enough to prevent from sticking open)
- Made with a spring that is more corrosion resistant than stainless steel!
- Made with a check ball that is more corrosion resistant than stainless steel!
- Units are not "glued" when manufactured which allows disassembly for cleaning.
- Do not confuse with similar looking cv's. These cost much more to manufacture... there is a difference!
This check valve utilizes "John Guest" style fittings (1/4" OD). It is mandatory to use this or similar. Silicone tubing will NOT seal correctly.
Maintenance: Even though these check valves are highly resistant to corrosion, they still need regular cleaning due to mineral deposits that accumulate and cause the check ball to stick partially open.
If the unit sticks open, water (or even worse, saltwater) will backflow in to the regulator causing damage.
How to clean: Unscrew the 2 halves (carefully with 2 pairs of pliers being careful not to crush). As you disassemble the unit, take note of where the pieces go. Soak all of the pieces in CLR to dissolve the mineral deposits. Ensure all pieces are clean then rinse and reassemble.
How to Test: To perform a leak test, simply reverse the check valve, set the regulator on 12 lbs, run it in a cup of water (while reversed) and watch for bubbles/leakage.


